Friday, 28 December 2007
Final Cuts
Tuesday, 13 November 2007
Post-Production
When I finished my capture I decided to start the edit by concentrating on the main part of the film - the making of the violin. Again I managed to use my written out VO text as a guideline to the careful selection of shots in the correct order. I managed to intercut wide angle shots with close ups, over-the shoulder shots with facial close-ups etc. Because during the filming process I concentrated on what I needed for editing the film, making sure that I had a variety of shots from different sizes and angles which could easily be intercut with one another, editing seemed all a lot easier than it did in any of my previous film or television productions.
Once I finished the raw edit for the main body of the film I began to concentrate on the opening sequence and the small history section during introduction. Unfortunately this is where I had to face my first difficulties. In order to successfully portray the history of violin making I had to use several images of i.e. old portraits of famous violin makers or photos of very old and valuable violins. In spite of never having work with images in an edit previously, I managed to upload them onto Final Cut and play them inside the preview window. Unfortunatelly, whenever I dragged them onto the timeline, the quality would increase. This problem, as I later learned, was not going to be fixed as there wasn't any way of changing the pictures quality. But fortunatelly the images were going to look much better when viewed on a Television screen and hence I could do nothing other than continue with what I was doing.
During a later stage of the edit I also managed to display the images, visible in the history section, in a more appealing way. By panning across them and/or zooming in and out, they seemed a lot more lively and closer to how someone would imagine a tv program to look like. Next I made sure that the entire edit looked clean and cut to the finish, so that I could then begin to add my chosen background music.
Saturday, 3 November 2007
The Shoot
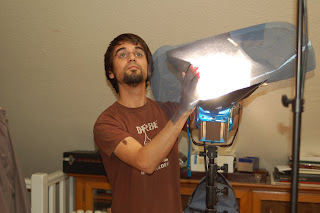
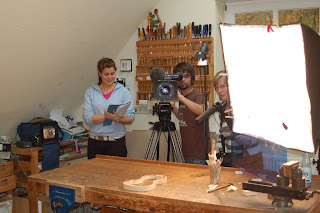
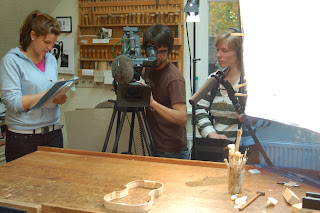
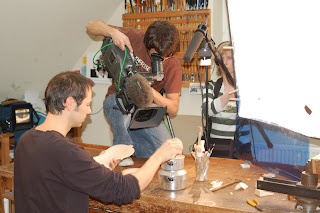
Due to the great efford of my team members (consisting of a camera student and a training sound girl) and the very important preperations I made during pre-production, the whole process of filming couldn't have worked out any better. The process of pre-production, from script to storyboard, time management to shoting scedule was especially helpful when I sat down with the camera man shortly before filming and thaught him through my ideas, the types of shots I needed to get, etc.


VO text
The human race has made and played a large variety musical instruments for thousands of years. But in western music, for almost 500 years the most important instruments have been those of the violin family. Most people still associate the violin with classical music, but it also hugely important in the modern entertainment industry. In fact it is so commonplace that we are often blissfully unaware of the essential role that it plays in television, film, and popular music and culture.
The violin first appeared in the small northern Italian city of Cremona in about 1550. It’s inventor was probably Andrea Amati who’s family along with their contemporise Guarneri and Antonio Stradivari became the most famous violin makers of all time.
Remarkably violins from these makers are still being played today. They are extremely valuable and are often sold at auction for millions of pounds. These inflated prices coupled with a massive surge in interest in countries like Japan, China and Korea, mean that the demand for new violins is still growing.
In spite of advances in technology the violin is still being made in the traditional way with traditional tools and materials. The main woods used for violin making are maple and spruce. Although common varieties only trees grown at high altitude in the alps can be used. They grow very slowly increasing in girth only about one or two mm per year. This means that some trees are more than a thousand years old when they are harvested.
Such timber is known as tone wood and before it can be used it must be stored and dried in the open air for at least ten years. A set of old tone wood for a single violin can cost as much as 2000 Pounds
The first stage in the making process is to steam bend thin strips of maple around a wooden form in the shape of a violin. These will become the instruments sides.
From these sides the outline of the violin is transferred onto the maple back and the spruce front blocks. These outlines are sawn out and finished with rasps and files.
Contrary to popular belief the bowed fronts and backs of violins are not bent to shape. They are in fact carved from solid blocks of wood with gauges and small planes.
When the outside shape is completed the both back and front are turned over and hollowed out. This hollowing process is complex and is critical to the final sound of the violin. It is one of the few processes in which modern technology can play a part. A tone generator is used to vibrate the plates and to create sound patterns with black powder. Although in earlier times these patterns were more difficult to create, they were known to Leonardo da Vinci in the 15th century.
With the hollowing complete two matching sound holes, are cut through the 2.5 mm thick belly. Their shape allows the centre of the spruce top to vibrate more freely in order to transmit sound.
Once the back and belly are completed the sides are removed from the wooden form and the main body of the instrument is assembled using a traditional glue made from animal gelatine.
With this stage of the operation completed, the violin maker begins work on the head and neck of the instrument. The so called scroll and peg-box is carved from a solid block of maple. Like the inlay the scroll has also become a symbol of the craftsmen’s skill.
A fingerboard of black ebony wood is then fixed onto the neck. This ebony board is the surface on which the players fingers will stop the strings in order to create individual notes.
It is essential that the fingerboard and neck are carefully worked and finished to the players individual requirements.
The final stage of the wood working process is fitting and gluing the neck into the body of the violin.
The violin is now ready for varnishing. This is one of the most difficult operations as both the tone and the appearance of a violin can be destroyed by poor varnishing.
For generations makers have tried to rediscover the secret of Stradivari’s magnificent varnish. However, in recent years scientific analysis has provided some answers to this age old question enabling modern makers to produce instruments that virtuoso violinists can rely upon.
Once the varnish has dried the maker applies the fittings which will eventually allow the player to release the violins sound, hopefully a sound that with luck and care will continue to please audiences for several hundred years.
Tuesday, 23 October 2007
Shooting Schedule
morning
Thurs
INT Workshop Day
making the violin
Bertrand Bellin
violin at diff. stages of production
DAY 1
afternoon
Thurs
INT Music Room Night
playing the finished violin
Angelika Bellin
violin
--- END of Day 1 Thu, 1. Nov 2007 -- ---
DAY 2
morning
Fri
INT Workshop Day
making the violin
varnishing the violin
violin at diff. stages of production
DAY 2
afternoon
Fri
INT Workshop, Music Room,
Cellar
Introductory shots
--- END of Day 2 – Fri, 2. Nov 2007 ---
Monday, 22 October 2007
Web TV - Research/Marketing
As well as having to think about, plan and eventually produce a program, one also has to think about the right way of marketing it. Because my program is part of a series of programs produced by the third year Kingston University Television students, we will have to think about the right ways of marketing them as a group. At the moment I decided to do some independent research, checking out Television web channels (i.e. 4OD, Joost) and online streaming channels like You Tube and Google Video. All of these can basically be described as new ways of watching your favourite Television programs and independent programs, videos, etc. on the web, usually free of charge to everyone. Because the internet becomes more and more important to more and more people from all around the world and because most viewers do not manage to watch their favourite TV programs at the same time every day (i.e. news, soap opera, chat shows, etc.) the so called “on demand” online ways of watching Television will most definitely become one of – if not the favourite way of watching Television in future. Being able to watch your favourite program or news channel at any given time during the day will suit in with the busy lifestyle of most families, business man and women, university students, doctors, teachers, shift workers and so on. In spite of all this we are thinking about setting up our own Television channel for the series of programs which we are planning to produce during the next couple of months. As well as that we are planning to broadcast them on famous online channels like You Tube.
Friday, 19 October 2007
Storyboard
The next thing that needed to be done was the Storyboard. Since I have never produced a storyboard myself, I decided to do a bit of research before I got started. In most cases the storyboard was described as the director’s visualisation of his script/idea/concept. This is usually done by transferring his or her thoughts onto paper in order to help crew members visualise his idea prior to the shoot.
After having done the research I began my storyboard for the documentary. Because I had very clear images of the type of shots I wanted to take, it didn’t take me long before I had my first few shots on paper. But because you have to be very specific about the things you draw and constantly think about how the object will look on film, it does take quite some time before the storyboard will be completed! As well as that, I found that as I was going along I kept thinking of different things and hence had to change and redraw certain parts. But as soon as I have it all pieced together I will try to scan it in and upload it onto the blog.